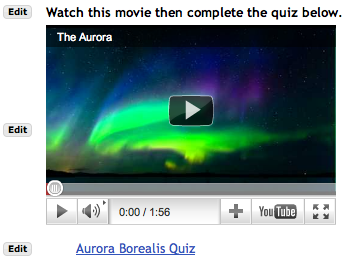
Sample page where Embed Content on Page has been used to add a Youtube video. For Youtube videos, you should go to a page showing the specific video you want, and simply copy the URL from the address bar at the top of the browser.

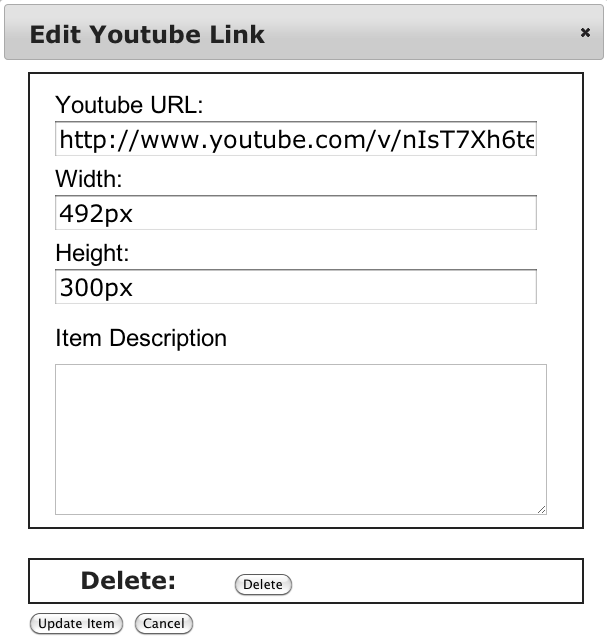
Sample of the dialog when you click on the Edit button.
There are several different ways to use audio and video in Lessons.
- Upload a file. In this case Lessons will choose a player to show the file. The player depends upon the type of file and the browser. In order to get the best results on a variety of devices, we recommend using MP4 format. For best use on portable devices, the file should be prepared with software that specifically optimizes for those devices. For audio, we recommend MP3, although WAV is also widely supported.
- Enter a URL for a file stored on the web. This should produce the same result as uploading the file through Lessons.
- Enter a URL for a video sharing site, e.g. Youtube. Lessons can recognize URLs for most common video sites, and add appropriate players. Most video sharing sites have options in the player to give you the URL for the video. Simply using the URL that shows in the bar at the top of your browser may not work.
- Enter an "embed code" or "widget code" for a video sharing site. Most video sharing sites have options in the player to give you an appropriate embed code. Many sites will give you both a URL and an embed code. You might try both to see which works better. Other things being equal, we recommend using the URL.
These methods can all be used in the Embed Content on Page option of the "Add Content" pulldown. Embed Content will put a player in your page so that students see the video itself. If you prefer to insert a link to the video, use Add Content Link. That allows all options except for "embed code."
Accessibility
If you are concerned about accessibility for handicapped users, please make sure you use the Edit button and insert textual descriptions for images and multimedia objects. You may want to consider creating a separate page that presents the content in a more accessible form and providing a link to it. One way to do this would be using Add Subpage.
MORE INFORMATION
Recommended Formats
For the moment, we recommend MP4 video. If you need to work with Apple devices, the MP4 files will need to be prepared specially. MP4 has many options, not all of which work with iPads and iPhones. Also, not all converters produce files that will start playing immediately, rather than waiting for the whole file to download. You can use Quicktime Pro, and export using the profile "Movie to iPhone." Then rename the file from .m4v to .mp4.
Flash Video (FLV) is also fairly well supported. However it will not work on portable devices.
For audio, we recommend MP3 or WAV.
Setting the Image Size
After using Embed Content on Page, you will probably need to use the Edit button to adjust the size. The size starts out 300 pixels high and the full width of the window. This size should let you see the content, but you may need to adjust it to match the size of your movie or Flash program.
For images, we recommend setting either width or height and leaving the other blank. The browser will pick an appropriate size for the one you left blank.
Some players will stretch or cut off the image if you don't set the right size. Older copies of Windows Media Player (e.g. on Windows XP) seem particularly prone to this. So for movies, it is safest to adjust the size to match the actual size and shape of the movie.
Where File Uploads Go
The "Upload file" feature will normally put files in a separate folder for each instance of the tool (i.e. each button in the left bar). If you prefer to organize the files yourself, you might prefer to upload your file using the Resource tool and get them organized. Then you can use "Choose Existing File" to put the file on a page.
In previous versions of Lessons, URLs were stored as files. URLs are stored in a subfolder called urls of the unit's folder.
Helping your Users
Unfortunately the ability to play movies, Flash, etc, tends to vary from browser to browser. You may want to create a unit that has one of each type of file you're going to use. That way students can make sure that they have the right plugins installed at the beginning of the course.
However you can simplify things for your users by picking types of video that are most widely supported. Modern browsers generally have good support for MP4. Lessons also has good support for Flash video (FLV), but it will not work on many portable devices, so MP4 is preferable where possible.
Known Issues
- The Macintosh Windows Media player will sometimes give you a blank image unless the file is public. You can make files public in the Resources tool using Edit Details. If you have a number of files that need to be public, you can make an entire folder public.
- Some players will not play content if you are using an https: URL and the site you're pointing to does not have a proper certificate installed.
- Increasingly, browsers will give warnings or simply refuse to play video unless all content on the page uses https: URLs. Files that are stored on Sakai will automatically be served with an appropriate URL, but if you enter any URLs for yourself, you should be careful about this.
- With Safari on the Macintosh, if you edit a Youtube video, and change the URL, when the page updates the player isn't there. If you refresh the page it works fine. Everything works fine for normal users.
- On Windows, users may need to adjust the security settings in Internet Explorer. For some player types, Active X needs to be enabled. You may not get any sign that this is the problem with IE, just an empty box where your content should be.
- If a plugin needs to talk to the user, it may fail. E.g. after installing Acrobat, the first time you run Acrobat, you need to accept the license. With Firefox you are prompted to do this. With Internet Explorer, it simply gives you an empty box where your content should be.